


On a recent project, I was tasked with integrating an OutSystems application with a vendor’s API. I had created several API integrations in the past inside of OutSystems, but this was something else. This vendor had many different APIs, each for a different part of the business logic, and each had to be called in sequence.
This integration was understandably one of the biggest early risk factors for the application. How long would this take to understand and implement? Would it work well inside of OutSystems?
Lucky for me, one of the developers who had been working on the project before I came on had done work exploring the APIs using an application called SOAP UI, a free and open source cross-platform functional testing solution for APIs and web services built in Java. He emailed me his SOAP UI workspace and I got to work building out the integration in OutSystems.
Now I know OutSystems makes API integrations fairly easy, but I was still blown away that I was able to create the entire integration module in less than a work day! SOAP UI gave me a huge leg up here since I could test and poke around in a decoupled environment. Once I had figured out the correct implementation, I could quickly port it over to to the OutSystems API editor.
Not only is SOAP UI a useful tool for implementing third party APIs, but it is designed for extensive testing of your own APIs, which can be extremely useful when exposing your own web services from OutSystems. Despite its specific name, SOAP UI can be used to test SOAP and REST web services as well as JMS, AMF, and make any HTTPS and JBDC calls.
This article will barely brush the surface of what SOAP UI has to offer. There is a paid commercial enterprise version, SOAP UI Pro, with more features to more fully automate API testing. In this particular case, the free version was more than enough.
Using SOAP UI to figure out complicated APIs
I created a dummy API in OutSystems to use with my example because the API I was trying to connect with in this particular case has a closed documentation and usage and it would not be possible for most to follow along. I created a rough implementation of the same authentication and security procedure to demonstrate SOAP UI. Feel free to follow along!
We will start with the first of our APIs to simply create a user.

Here we are connecting to the API that manages the Users for the integration. When the user creates an account in your service, OutSystems will create a User in the API and get back that user in the response. (For OutSystems folks, I am not referring to the Platform’s User entity.)
In SOAP UI, create a new REST Project. We will use the user URI first to connect.
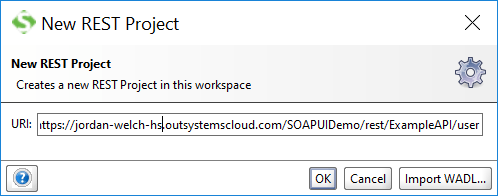
Here you see, we could Import a WADL file if one were present. We could also import a Swagger specification, which is useful in testing your OutSystems web services, which I will discuss later.
Once we create this new project, it will automatically create a GET request.
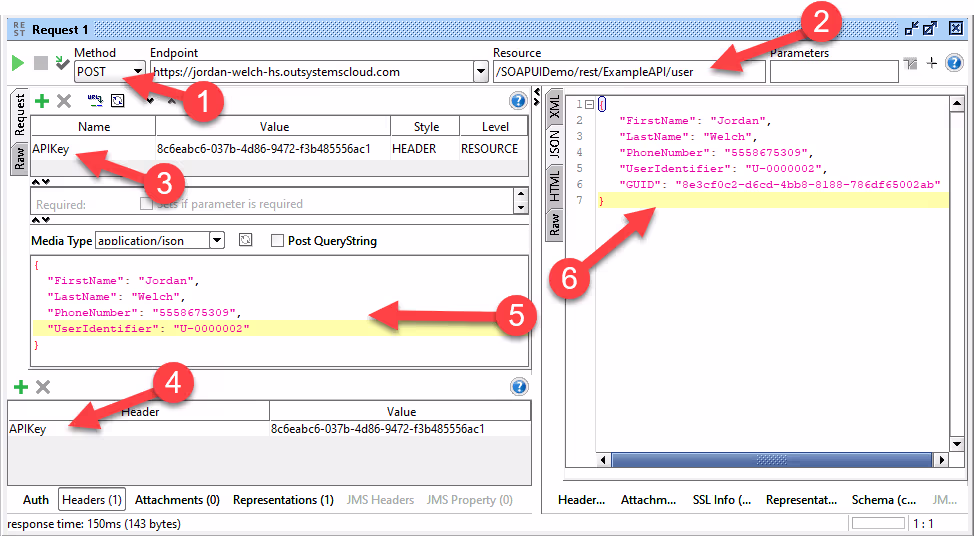
- First I change this to a POST request to create a new user.
- You can see the URL being accessed at the top broken into Endpoint and Resource.
- On the left of the screen you specify the Request. Here you can add the APIKey specified for the Header.
- Headers can also be specified under the header tab at the bottom, this can be useful for variables you wouldn’t be changing much, such as content or accept type.
- In the request body section you can specify the type of media being presented and then correctly define your JSON structure.
- Once the request is run successfully, the Response will be displayed on the right. It can correctly format XML, JSON, HTML or give you the Raw response.
Next we will add the GET User by right clicking the Users resource in the left pane and creating a New Method.
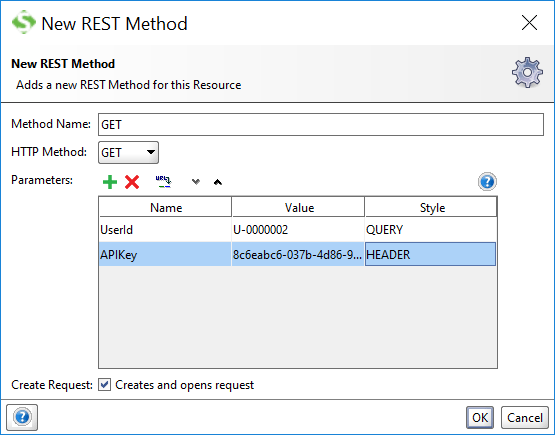
Here, we can easily add both the API Key Header as well as a UserId as a query inside of the URL.
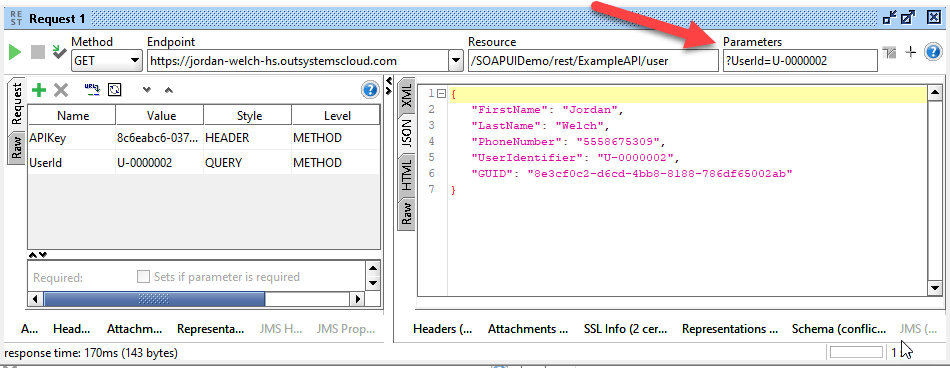
Here, we see our created GET request. Notice the Query parameters are specified in the top bar with the URI.
Now, looking at where the integration got complicated, we have the process required to create information for a user. In this case, a food order.

Here, we see the integration getting a bit more complicated. When a User decides to create an order, we first authenticate that user with their User Identifier and our API key to get us an API token from the SSO API. That API token generates a User session with our Deep Integration API. Finally, this session token creates an order for that specific user.
Of course, this may seem like many security steps for a hamburger order, but hush, it’s just an example.
To connect to a new URI, we will right-click on the REST Service and create a New Resource. You don’t need to specify out to the entire endpoint. You can also specify any URI parameters while you add the resource.
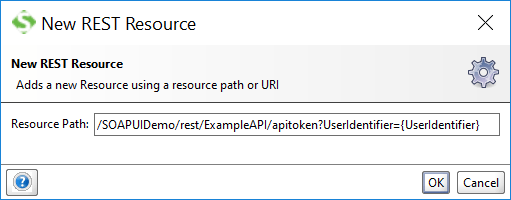
If you are adding a service with a different endpoint, that can be added at the project level by adding a new REST service and following our procedure from earlier.
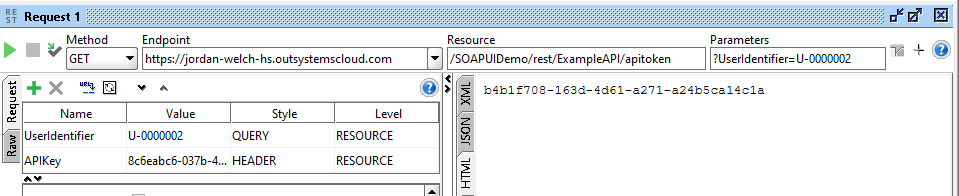
You can then add the APIKey header variable and assign it to your APIKey.
You can repeat this process with the SessionToken Resource passing the API token and getting back a session token.
/SOAPUIDemo/rest/ExampleAPI/sessions
Finally, we can complete the integration by implementing our POST orders request with a session token in the Header and orders specified in the body.
Having my integration planned in SOAP UI was particularly helpful in this example when it came to making sure I could quickly and easily get a valid session token to generate the Response body for each API method I then implemented.
Using SOAP UI to Test Exposed OutSystems APIs
Though I used SOAP UI to flesh out and understand integration with a vendor’s API, it can also be used to test your own APIs exposed from OutSystems.
Importing your exposed REST API into SOAP UI is as easy as importing the Swagger definition.
Under your projects, create an Empty Project. Then Select “Import Swagger”. Enter the path to your integrations Swagger file. Once you have imported the Swagger file, you simply need to set the endpoint on each of the Requests generated, and you have a full implementation of your API, which you can test. Make sure it behaves the way you expect and that you assign all the input variables to the right section: header, URL, or body.

This is only scratching the surface of what is available in SOAP UI, not to mention the extended features found in the Pro version. I hope that this new tool helps you in OutSystems integrations and beyond!
